MIC INPUT. Connect your 1/8” Microphone to this Input. The Microphone Inputs is not part of the USB audio interface, therefore it can not be added to the Audio setup of VirtualDJ, neither can be controlled by the software or recorded
MIC VOL. Adjust the volume of the Microphone input signal. Hardware operation (not visible on the VirtualDJ GUI).
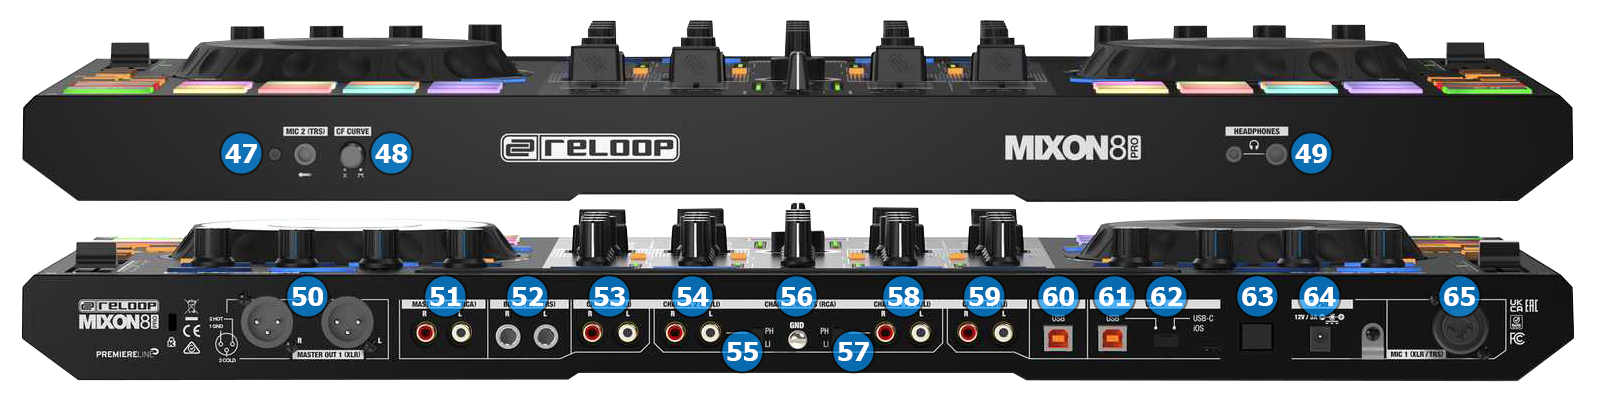
HEADPHONES INPUT. Connect a pair of Headphones to this socket (1/4” or 1/8”). The Volume of this Output is controlled by the knob at the top panel
MASTER OUTPUT BALANCED (XLR): Connect this low-impedance XLR output to a PA system or powered monitors. The level of this output is controlled with the Master knob on the top panel.
MASTER OUTPUT UNBALANCED (RCA): Use standard RCA cables to connect this output to a speaker or amplifier system. The level of this output is controlled by the Master knob on the top panel.
BOOTH OUTPUT (TRS): Use standard TRS cables to connect this output to a booth monitoring system. The level of this output is controlled by the Booth knob on the top panel.
DECK 4 LINE INPUT: Use standard RCA cables to connect analog audio sources such as CD players on the 4th mixing channel of Mixon 8 Pro.
DECK 2 LINE/PHONO INPUT: Use standard RCA cables to connect analog audio sources such as CD players or Turntables on the 2nd mixing channel of Mixon 8 Pro.
DECK 2 LINE/PHONO INPUT SWITCH: Set this switch according to the type of analog device that's connected on the deck 2 input.
GND SCREW: Use this screw to connect the ground terminal(s) of your turntable(s)
DECK 1 LINE/PHONO INPUT SWITCH: Set this switch according to the type of analog device that's connected on the deck 1 input.
DECK 1 LINE/PHONO INPUT: Use standard RCA cables to connect analog audio sources such as CD players or Turntables on the 1st mixing channel of Mixon 8 Pro.
DECK 3 LINE INPUT: Use standard RCA cables to connect analog audio sources such as CD players on the 3rd mixing channel of Mixon 8 Pro.
USB B. This USB type B connection sends and receives audio and control information from a connected computer.
USB A. This USB type B connection sends and receives audio and control information from a connected computer.
USB A SWITCH. Select whether the USB type B port will be used for USB A connection (computer communication) or the USB type C (iOS communication)
POWER: Use the Power Switch to turn the MIXON 8 PRO on/off. Turn on the unit after all input devices have been connected and before you turn on your amplifiers. Turn off your amplifiers before turning off MIXON 8 PRO.
PSU. Use the provided AC/DC power supply. While the power is switched off, plug the cable into MIXON 8 PRO first, and then plug the cable into a power outlet.
MIC INPUT. Connect your microphone. You can use both XLR or 1/4" jack connectors.
For further Technical features and specifications, visit