


DJM-A9
ADVANCED SETUP
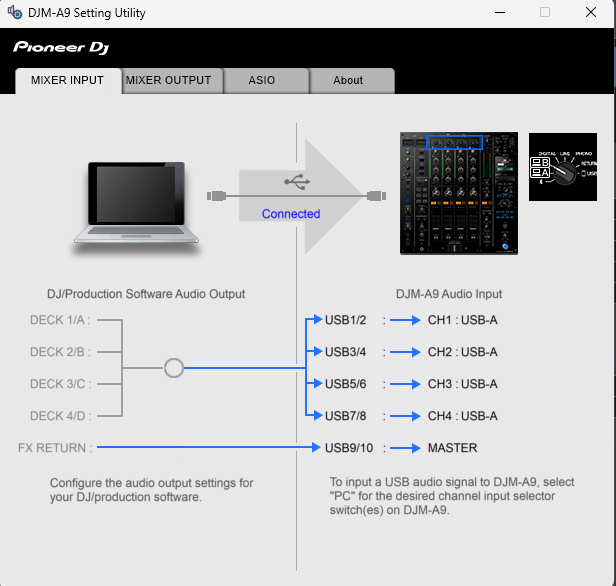
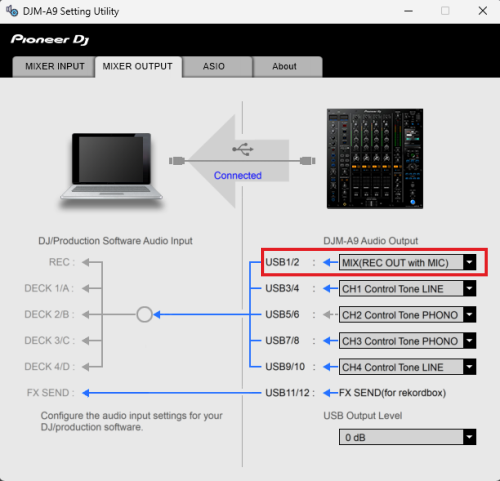
The DJM-A9 offers 2 built-in USB Audio interfaces (sound cards) by connecting the device with a USB port of a computer using the USB A or USB B sockets and each one of them offers 10 Outputs and 12 Inputs. The Inputs and Outputs Channels routing is available from the Pioneer DJM-A9 Setting Utility.
You can open the Utility window with the following ways :
For Windows computer: :
Click on the ASIO button from VirtualDJ AUDIO tab of VirtualDJ Settings,
or navigate using [Windows START] menu [Pioneer] [DJM-A9 Settings Utility]
For Mac OSX computer:
Navigate to [MACINTOSH HD] icon [Applications] [Pioneer] [DJM-A9 Settings Utility]
POST-FADER SOFTWARE EFFECTS
Hardware Effects applied from the DJM-A9 are always Post-fader. For VirtualDJ Effects (applied from skin or other MIDI device), you will need to have the following settings.
- fxprocessing setting to Post-Fader (from VirtualDJ Settings->OPTIONS tab

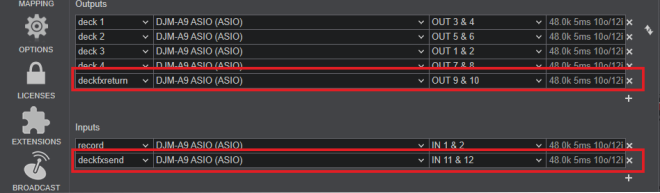
- In VirtualDJ AUDIO tab, deckfxreturn and deckfxsend are already assigned to the same Channels as in Pioneer Settings Utility.
RECORD & BROADCAST
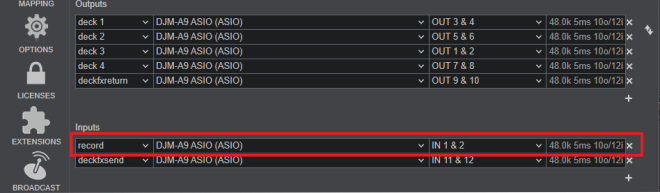
Recording your mix with a mixer applying it's own audio mixing, Equalizer and Effects, requires a dedicated Recording Input. By default VirtualDJ is using Inputs 1,2 and the special record input is included in the pre-defined Audio setup of VirtualDJ
Just make sure your Audio setup and Pioneer Settings Utility have the same Channels.
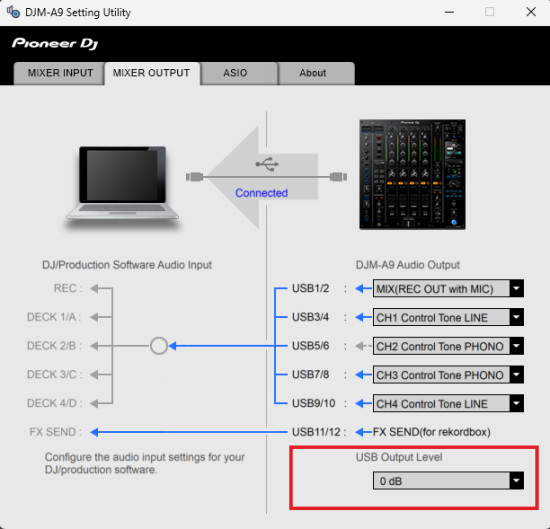
RECORDING LEVEL
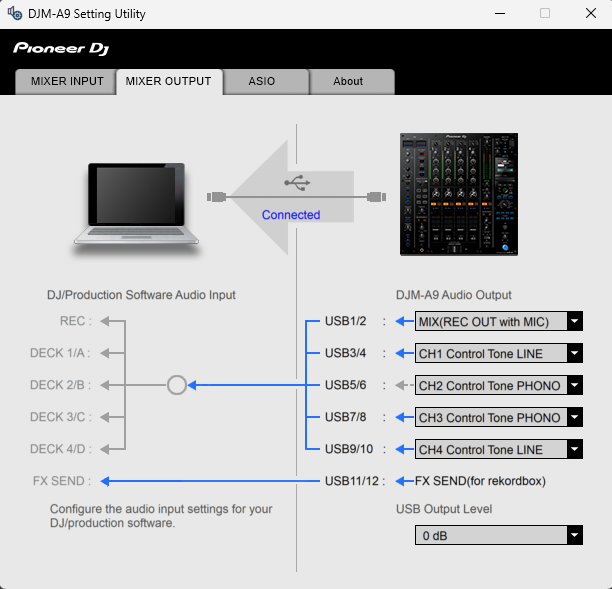
By default when you are recording with a dedicated Record input, VirtualDJ has no control over the sound levels of the recordings. The Pioneer Settings Utility offers some options over the sound level that it sends back to VirtualDJ for recording. The default value is 0 db but if your recording is low in level, you can change that value to a higher one, from Pioneer Setting Utility.
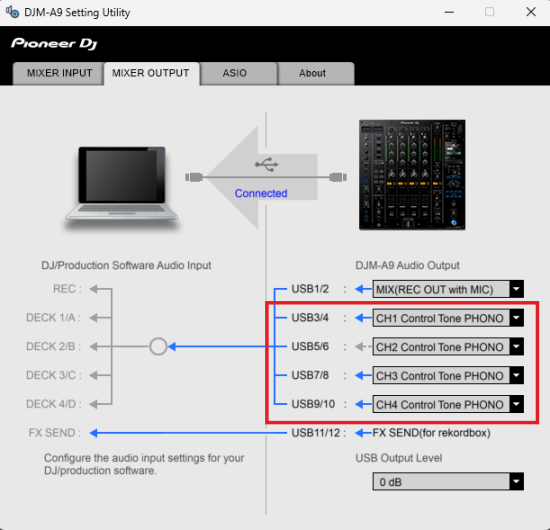
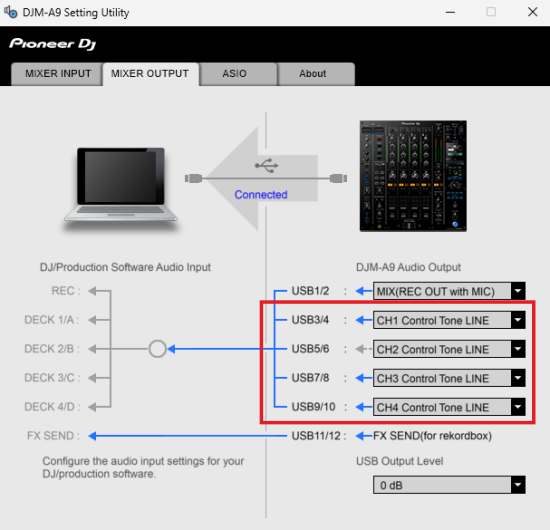
TIMECODE - DVS
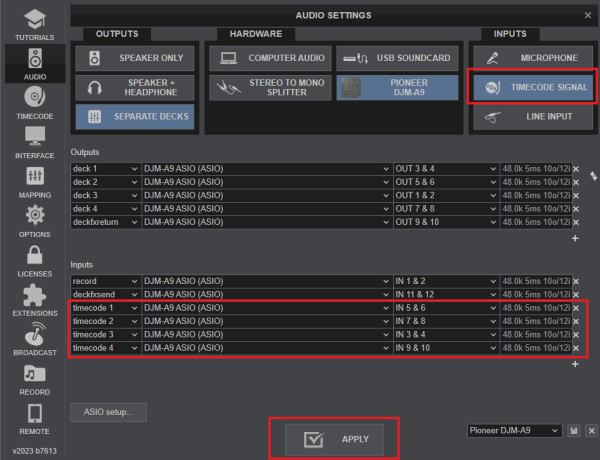
By default up to 4 Timecode inputs can offer DVS control to 4 VirtualDJ Decks, using CH Inputs 1 to 4. Read further information for Timecode Inputs at VirtualDJ Manual
- Depending on the DVS/Timecode device type (Turntable-Vinyl or CD), connect your Timecode device to the LINE or PHONO inputs at the rear panel of the DJM-A9
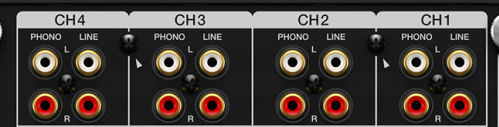
Pioneer DJM-A9 - Rear panel - Timecode Inputs - Open VirtualDJ Settings and select the AUDIO tab.
- Click on the TIMECODE SIGNAL button at the top-right and VirtualDJ will add the necessary inputs in sound setup. You can remove the inputs that are not connected (e.g leave only 2 of them if you are using just 2 Timecode inputs)
- Click APPLY.
Make sure you use the same Input channels in both VirtualDJ and Pioneer Settings Utilities.
HID VIA LINK
Pioneer DJM-A9 supports Pioneer's "HID via LINK" protocol when used together with compatible devices (CDJ-2000NXS2 and/or CDJ-3000).
"HID via LINK" offers the ability to use only one USB connection (that of the mixer) in order to control all supported devices connected on Pioneer's "LINK" network.
For more information on how to use "HID via LINK" protocol with DJM-A9 and supported devices please read HID via LINK Setup Manual
