


DJM-250MK2
ADVANCED SETUP
The Pioneer DJM-250MK2 offers a built-in audio interface with 4 stereo Outputs and 4 stereo Inputs. The Inputs are determined by the Input Select switchers at the top panel of the unit.
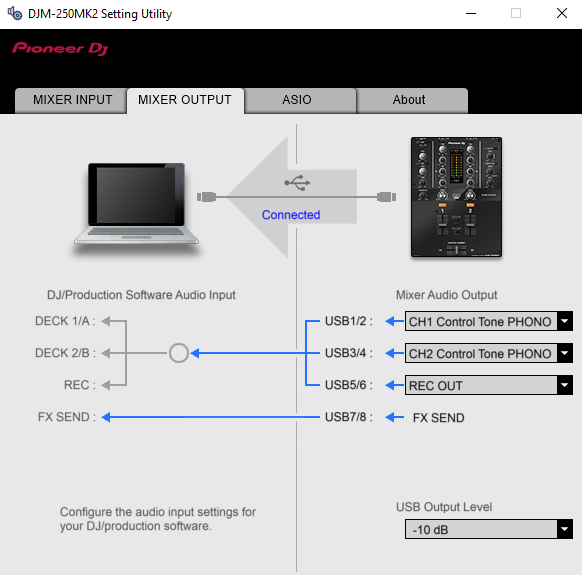
The USB Output Channels can be set to different modes via the Pioneer DJM-250MK2 Setting Utility
How to open the DJM-250MK2 Utilities:
For Windows computer:
From VirtualDJ Settings AUDIO tab, click on the ASIO button,
or from Windows Desktop, click [START] menu [All Programs] [Pioneer] [DJM-250MK2 ] [Pioneer DJM-250MK2 Settings Utility]
For Mac OSX computer:
Click [MACINTOSH HD] icon [Applications] [Pioneer] [DJM-250MK2 ] [Pioneer DJM-250MK2 Settings Utility]
Timecode (DVS)
VirtualDJ is offering DVS (Digital Vinyl System) support for the Pioneer DJM-250MK2 . A Timecode Plus or Pro Infinity license is required. http://www.virtualdj.com/buy/index.html
Up to 2 Timecode Inputs are available to control any software decks via Timecode CDs or Vinyls.
Make sure the Input switchers at the top panel are set to USB position.
Open the Pioneer DJM-250MK2 Setting Utility and set the USB Channel Outputs 1/2 and 3/4 to the appropriate mode.
In this example (as shown in the side picture), 2 Timecode Vinyls (turntables) have been connected to CH1 and CH2 PHONO Inputs
Close the Settings Utility
Open the AUDIO tab of VirtualDJ Settings and click on the TIMECODE button. VirtualDJ will then auto-create 2 Timecode Inputs.
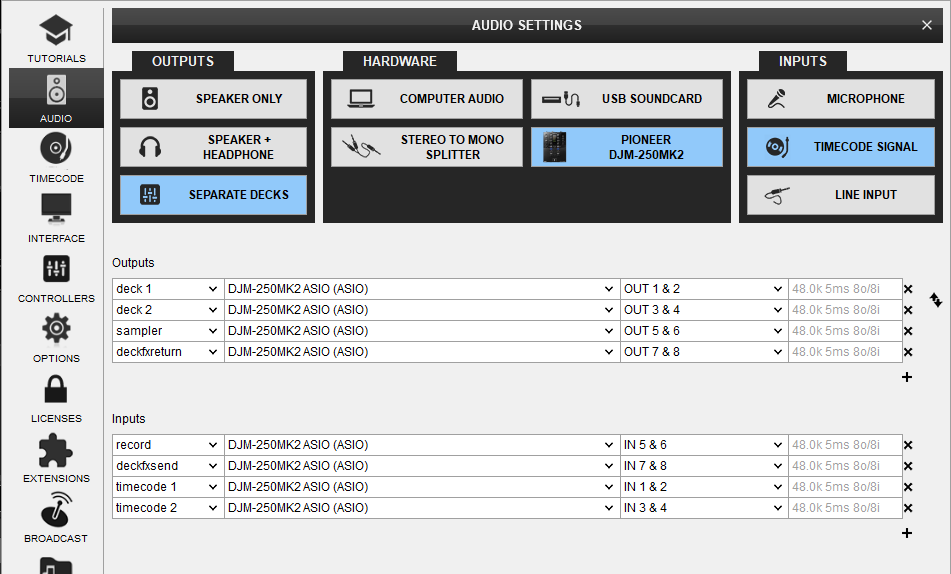
Click to APPLY.
Press PLAY on your timecode CD and/or Vinyl device and VirtualDJ will automatically detect your Timecode type and make the appropriate adjustments for best performance.
Open the TIMECODE tab of the VirtualDJ Settings and choose the CALIBRATE button if for any reason the signal is not detected (possibly due to reversed phase connections).
Click on the ON buttons from the TIMECODE panels of the Default Skin to enable the Timecode control to any software deck.
Recording
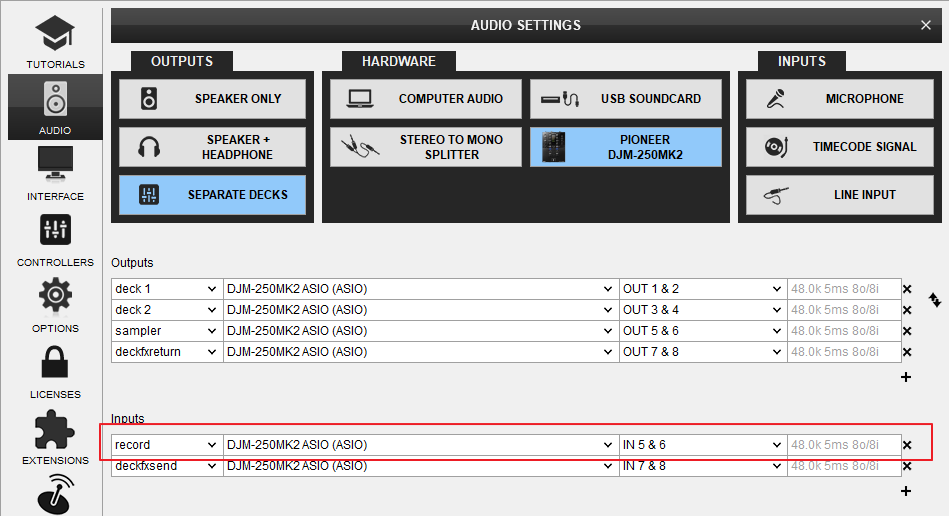
The Pioneer DJM-250MK2 is offering a Record Output channel which by default is used to record your mix (and Aux/Mic Inputs) via VirtualDJ Record function.
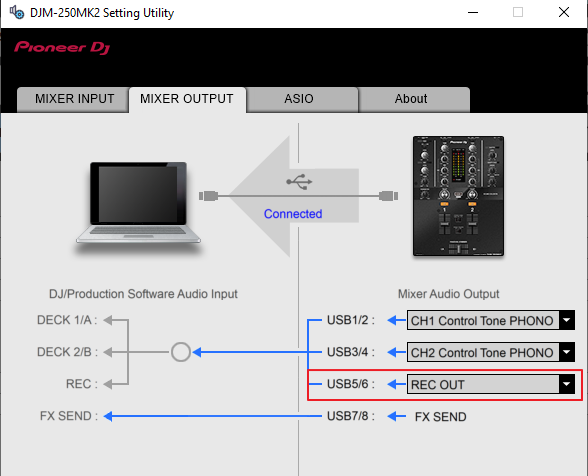
Just make sure the USB 5/6 Output is set to REC from the Pioneer DJM-250MK2 Utilities
Open the MASTER center panel of the VirtualDJ GUI and click to the REC button (or BCAST for broadcasting) to record your mix.
